(Editing a gallery) |
No edit summary Tag: Source edit |
||
| (37 intermediate revisions by 18 users not shown) | |||
| Line 1: | Line 1: | ||
| − | {{Infobox |
+ | {{Infobox Episode |
|bgcolor = grey |
|bgcolor = grey |
||
|txtcolor = brown |
|txtcolor = brown |
||
| − | |image = |
+ | |image = ABGO RockyRoadLogo.png |
| − | |imagewidth = |
+ | |imagewidth = 200px |
|Box title = Rocky Road |
|Box title = Rocky Road |
||
| − | | |
+ | |released = December 11th, 2013 |
| − | |levels = 15 challenges, 3 tracks |
+ | |levels = '''v1.0:''' 15 challenges, 3 tracks |
| − | | |
+ | |episode = 2 |
| − | | |
+ | |previous = [[Seedway]] |
| − | | |
+ | |next = [[Air]] |
| − | | |
+ | |game = ''[[Angry Birds Go!]]''}} |
'''Rocky Road''' is the second episode/circuit in ''[[Angry Birds Go!]]'' The track has bumpy and wavy roads, as well as large ramps made up of the roads. |
'''Rocky Road''' is the second episode/circuit in ''[[Angry Birds Go!]]'' The track has bumpy and wavy roads, as well as large ramps made up of the roads. |
||
| + | In the ''Angry Birds Go!'' 2.0 update, a kart to Rocky Road (Cool Runner) is unlocked after beating event 4–1, making it the 4th track to unlock. |
||
| − | ==Karts== |
||
| − | *[[King Pig]]'s karts |
||
| − | #Beach Buggy (Level 1) |
||
| − | #Royal Blue (Level 2) |
||
| − | #Green Machine (Level 3) |
||
| − | #Royal Snout (Level 4) |
||
| − | #Royal Rumbler (Level 6) |
||
| − | *[[Blue Bird|The Blues]]' karts |
||
| − | #Capster (Level 1) |
||
| − | #Lucky Skater (Level 2) |
||
| − | #Home Runner (Level 3) |
||
| − | #Punch Box (Level 4) |
||
| − | #Tri-Toaster (Level 6) |
||
| − | *[[Big Brother Bird|Terence]]'s karts |
||
| − | #Card-Board (Level 1) |
||
| − | #Cool Runner (Level 2) |
||
| − | #Picnic Packer (Level 3) |
||
| − | #Big Burner (Level 4) |
||
| − | #Beep Beep (Level 6) |
||
| + | ==Tracks== |
||
| − | Added in v.1.2.0 Sub Zero Preview Update |
||
| + | *Mighty Mountain |
||
| − | *[[Boomerang Bird|Hal]]'s kart |
||
| + | *Hog Hideaway |
||
| − | #Phoenix Star (Level 6) |
||
| + | *Oink Canyon |
||
| + | ==List of Rocky Road Karts== |
||
| − | ==Kart Prices== |
||
| + | <tabber> |
||
| − | {| border="0" cellpadding="1" cellspacing="1" class="wikitable" style="width:100%;" |
||
| + | Angry Birds Go! v1.0= |
||
| + | {|class="wikitable" border=1 cellpadding=3 style=width:100%; border-collapse:collapse align=center |
||
|- |
|- |
||
| + | !colspan=4 |[[File:ABGO_RockyRoadLogo.png|200px|link=]] |
||
| − | ! scope="col" style="width:30%;"|Kart Name |
||
| − | ! scope="col" style="width:20%;"|Level |
||
| − | ! scope="col" style="width:25%;"|CC |
||
| − | ! scope="col" style="width:25%;"|Cost |
||
|- |
|- |
||
| + | !width=10% rowspan="1" |Karts |
||
| − | | style="text-align:center;vertical-align:middle;"|<span style="text-align:left;">Beach Buggy</span> |
||
| + | !width=10% colspan="1" |Cost |
||
| − | | style="text-align:center;vertical-align:middle;"|1 |
||
| + | !width=10% rowspan="1" |Cake Capacity |
||
| − | | style="text-align:center;vertical-align:middle;"|271 |
||
| + | !width=10% rowspan="1" |Stats |
||
| − | | style="text-align:center;vertical-align:middle;"|[[File:Bird_Coins.png|link=Bird Coins|25px]] 2,000 |
||
|- |
|- |
||
| + | |[[File:KART34.png|center|120px]]<p style="text-align: center;">'''Lucky Goat 888 L6 ([[GO! Karts#Special Karts|*]])'''</p> |
||
| − | | style="text-align:center;vertical-align:middle;"|<span style="background-color:rgb(255,255,255);"><span style="text-align:left;">Capster</span></span> |
||
| + | | |
||
| − | | style="text-align:center;vertical-align:middle;"|1 |
||
| − | + | <p style="text-align: center;">[[File:ABF birdcoin.png|25px|link=]] 8 ('''limited time''')</p> |
|
| + | | |
||
| − | | style="text-align:center;vertical-align:middle;"|[[File:Gem.png|25px|Gems]] 180 |
||
| + | <p style="text-align: center;">301cc to 660cc</p> |
||
| + | | |
||
| + | <p style="text-align: center;">[[File:ABGO TopSpeed.png|25px|link=]] 4 to 13<br />[[File:ABGO Acceleration.png|25px|link=]] 3 to 12<br />[[File:ABGO Handling.png|25px|link=]] 3 to 12<br />[[File:ABGO Strength.png|25px|link=]] 4 to 13</p> |
||
|- |
|- |
||
| + | |[[File:KART85.png|center|120px]]<p style="text-align: center;">'''Monkey Kart L6 ([[GO! Karts#Special Karts|*]])'''</p> |
||
| − | | style="text-align:center;vertical-align:middle;"|<span style="background-color:rgb(255,255,255);"><span style="text-align:left;">Card-Board</span></span> |
||
| + | | |
||
| − | | style="text-align:center;vertical-align:middle;"|1 |
||
| + | <p style="text-align: center;">Free ('''limited time'''; unlock after you get 88 seconds of airtime over every event)</p> |
||
| − | | style="text-align:center;vertical-align:middle;"|291 |
||
| + | | |
||
| − | | style="text-align:center;vertical-align:middle;"|[[File:Gem.png|25px|Gems]] 600 |
||
| + | <p style="text-align: center;">301cc to 660cc</p> |
||
| + | | |
||
| + | <p style="text-align: center;">[[File:ABGO TopSpeed.png|25px|link=]] 4 to 13<br />[[File:ABGO Acceleration.png|25px|link=]] 3 to 12<br />[[File:ABGO Handling.png|25px|link=]] 3 to 12<br />[[File:ABGO Strength.png|25px|link=]] 4 to 13</p> |
||
|- |
|- |
||
| + | |[[File:KART18.png|center|120px]]<p style="text-align: center;">'''Beach Buggy L1'''</p> |
||
| − | | style="text-align:center;vertical-align:middle;"|<span style="background-color:rgb(255,255,255);"><span style="text-align:left;">Royal Rumbler</span></span> |
||
| + | | |
||
| − | | style="text-align:center;vertical-align:middle;"|6 |
||
| − | + | <p style="text-align: center;">[[File:ABF birdcoin.png|25px|link=]] 3,000</p> |
|
| + | | |
||
| − | | style="text-align:center;vertical-align:middle;"|[[File:Gem.png|25px|Gems]] 1,500 |
||
| + | <p style="text-align: center;">271cc to 390cc</p> |
||
| + | | |
||
| + | <p style="text-align: center;">[[File:ABGO TopSpeed.png|25px|link=]] 1 to 4<br />[[File:ABGO Acceleration.png|25px|link=]] 0 to 3<br />[[File:ABGO Handling.png|25px|link=]] 1 to 4<br />[[File:ABGO Strength.png|25px|link=]] 4 to 7</p> |
||
|- |
|- |
||
| + | |[[File:KART19.png|center|120px]]<p style="text-align: center;">'''Royal Blue L2'''</p> |
||
| − | | style="text-align:center;vertical-align:middle;"|<span style="background-color:rgb(255,255,255);"><span style="text-align:left;">Tri-Toaster</span></span> |
||
| + | | |
||
| − | | style="text-align:center;vertical-align:middle;"|6 |
||
| − | + | <p style="text-align: center;">N/A</p> |
|
| + | | |
||
| − | | style="text-align:center;vertical-align:middle;"|[[File:Gem.png|25px|Gems]] 3,000 |
||
| + | <p style="text-align: center;">390cc to 510cc</p> |
||
| + | | |
||
| + | <p style="text-align: center;">[[File:ABGO TopSpeed.png|25px|link=]] 4 to 7<br />[[File:ABGO Acceleration.png|25px|link=]] 3 to 6<br />[[File:ABGO Handling.png|25px|link=]] 4 to 7<br />[[File:ABGO Strength.png|25px|link=]] 7 to 10</p> |
||
|- |
|- |
||
| + | |[[File:KART20.png|center|120px]]<p style="text-align: center;">'''Green Machine L3'''</p> |
||
| − | | style="text-align:center;vertical-align:middle;"|<span style="background-color:rgb(255,255,255);"><span style="text-align:left;">Beep Beep</span></span> |
||
| + | | |
||
| − | | style="text-align:center;vertical-align:middle;"|6 |
||
| − | + | <p style="text-align: center;">N/A</p> |
|
| + | | |
||
| − | | style="text-align:center;vertical-align:middle;"|[[File:Gem.png|25px|Gems]] 6,000 |
||
| + | <p style="text-align: center;">510cc to 630cc</p> |
||
| + | | |
||
| + | <p style="text-align: center;">[[File:ABGO TopSpeed.png|25px|link=]] 7 to 10<br />[[File:ABGO Acceleration.png|25px|link=]] 6 to 9<br />[[File:ABGO Handling.png|25px|link=]] 7 to 10<br />[[File:ABGO Strength.png|25px|link=]] 10 to 13</p> |
||
|- |
|- |
||
| − | | |
+ | |[[File:KART21.png|center|120px]]<p style="text-align: center;">'''Royal Snout L4'''</p> |
| + | | |
||
| − | | style="text-align:center;vertical-align:middle;"|6 |
||
| − | + | <p style="text-align: center;">N/A</p> |
|
| + | | |
||
| − | | style="text-align:center;vertical-align:middle;"|[[File:Gem.png|25px|Gems]] 9,000 |
||
| + | <p style="text-align: center;">630cc</p> |
||
| + | | |
||
| + | <p style="text-align: center;">[[File:ABGO TopSpeed.png|25px|link=]] 10<br />[[File:ABGO Acceleration.png|25px|link=]] 9<br />[[File:ABGO Handling.png|25px|link=]] 10<br />[[File:ABGO Strength.png|25px|link=]] 13</p> |
||
| + | |- |
||
| + | |[[File:KART23.png|center|120px]]<p style="text-align: center;">'''Capster L1'''</p> |
||
| + | | |
||
| + | <p style="text-align: center;">[[File:Gem.png|25px|link=]] 240</p> |
||
| + | | |
||
| + | <p style="text-align: center;">281cc to 400cc</p> |
||
| + | | |
||
| + | <p style="text-align: center;">[[File:ABGO TopSpeed.png|25px|link=]] 3 to 6<br />[[File:ABGO Acceleration.png|25px|link=]] 1 to 4<br />[[File:ABGO Handling.png|25px|link=]] 2 to 5<br />[[File:ABGO Strength.png|25px|link=]] 0 to 3</p> |
||
| + | |- |
||
| + | |[[File:KART24.png|center|120px]]<p style="text-align: center;">'''Lucky Skater L2'''</p> |
||
| + | | |
||
| + | <p style="text-align: center;">N/A</p> |
||
| + | | |
||
| + | <p style="text-align: center;">401cc to 520cc</p> |
||
| + | | |
||
| + | <p style="text-align: center;">[[File:ABGO TopSpeed.png|25px|link=]] 6 to 9<br />[[File:ABGO Acceleration.png|25px|link=]] 4 to 7<br />[[File:ABGO Handling.png|25px|link=]] 5 to 8<br />[[File:ABGO Strength.png|25px|link=]] 3 to 6</p> |
||
| + | |- |
||
| + | |[[File:KART25.png|center|120px]]<p style="text-align: center;">'''Home Runner L3'''</p> |
||
| + | | |
||
| + | <p style="text-align: center;">N/A</p> |
||
| + | | |
||
| + | <p style="text-align: center;">520cc to 640cc</p> |
||
| + | | |
||
| + | <p style="text-align: center;">[[File:ABGO TopSpeed.png|25px|link=]] 9 to 12<br />[[File:ABGO Acceleration.png|25px|link=]] 7 to 10<br />[[File:ABGO Handling.png|25px|link=]] 8 to 11<br />[[File:ABGO Strength.png|25px|link=]] 6 to 9</p> |
||
| + | |- |
||
| + | |[[File:KART26.png|center|120px]]<p style="text-align: center;">'''Punch Box L4'''</p> |
||
| + | | |
||
| + | <p style="text-align: center;">N/A</p> |
||
| + | | |
||
| + | <p style="text-align: center;">640cc</p> |
||
| + | | |
||
| + | <p style="text-align: center;">[[File:ABGO TopSpeed.png|25px|link=]] 12<br />[[File:ABGO Acceleration.png|25px|link=]] 10<br />[[File:ABGO Handling.png|25px|link=]] 11<br />[[File:ABGO Strength.png|25px|link=]] 9</p> |
||
| + | |- |
||
| + | |[[File:KART28.png|center|120px]]<p style="text-align: center;">'''Card-Board L1'''</p> |
||
| + | | |
||
| + | <p style="text-align: center;">[[File:Gem.png|25px|link=]] 720</p> |
||
| + | | |
||
| + | <p style="text-align: center;">291cc to 410cc</p> |
||
| + | | |
||
| + | <p style="text-align: center;">[[File:ABGO TopSpeed.png|25px|link=]] 4 to 7<br />[[File:ABGO Acceleration.png|25px|link=]] 1 to 4<br />[[File:ABGO Handling.png|25px|link=]] 0 to 3<br />[[File:ABGO Strength.png|25px|link=]] 3 to 6</p> |
||
| + | |- |
||
| + | |[[File:KART29.png|center|120px]]<p style="text-align: center;">'''Cool Runner L2'''</p> |
||
| + | | |
||
| + | <p style="text-align: center;">N/A</p> |
||
| + | | |
||
| + | <p style="text-align: center;">410cc to 530cc</p> |
||
| + | | |
||
| + | <p style="text-align: center;">[[File:ABGO TopSpeed.png|25px|link=]] 7 to 10<br />[[File:ABGO Acceleration.png|25px|link=]] 4 to 7<br />[[File:ABGO Handling.png|25px|link=]] 3 to 6<br />[[File:ABGO Strength.png|25px|link=]] 6 to 9</p> |
||
| + | |- |
||
| + | |[[File:KART30.png|center|120px]]<p style="text-align: center;">'''Picnic Packer L3'''</p> |
||
| + | | |
||
| + | <p style="text-align: center;">N/A</p> |
||
| + | | |
||
| + | <p style="text-align: center;">530cc to 650cc</p> |
||
| + | | |
||
| + | <p style="text-align: center;">[[File:ABGO TopSpeed.png|25px|link=]] 10 to 13<br />[[File:ABGO Acceleration.png|25px|link=]] 7 to 10<br />[[File:ABGO Handling.png|25px|link=]] 6 to 9<br />[[File:ABGO Strength.png|25px|link=]] 9 to 12</p> |
||
| + | |- |
||
| + | |[[File:KART31.png|center|120px]]<p style="text-align: center;">'''Big Burner L4'''</p> |
||
| + | | |
||
| + | <p style="text-align: center;">N/A</p> |
||
| + | | |
||
| + | <p style="text-align: center;">650cc</p> |
||
| + | | |
||
| + | <p style="text-align: center;">[[File:ABGO TopSpeed.png|25px|link=]] 13<br />[[File:ABGO Acceleration.png|25px|link=]] 10<br />[[File:ABGO Handling.png|25px|link=]] 9<br />[[File:ABGO Strength.png|25px|link=]] 12</p> |
||
| + | |- |
||
| + | |[[File:KART22.png|center|120px]]<p style="text-align: center;">'''Royal Rumbler L6'''</p> |
||
| + | | |
||
| + | <p style="text-align: center;">[[File:Gem.png|25px|link=]] 1,500</p> |
||
| + | | |
||
| + | <p style="text-align: center;">301cc to 660cc</p> |
||
| + | | |
||
| + | <p style="text-align: center;">[[File:ABGO TopSpeed.png|25px|link=]] 3 to 12<br />[[File:ABGO Acceleration.png|25px|link=]] 4 to 13<br />[[File:ABGO Handling.png|25px|link=]] 2 to 11<br />[[File:ABGO Strength.png|25px|link=]] 1 to 10</p> |
||
| + | |- |
||
| + | |[[File:KART27.png|center|120px]]<p style="text-align: center;">'''Tri-Toaster L6'''</p> |
||
| + | | |
||
| + | <p style="text-align: center;">[[File:Gem.png|25px|link=]] 1,500</p> |
||
| + | | |
||
| + | <p style="text-align: center;">311cc to 670cc</p> |
||
| + | | |
||
| + | <p style="text-align: center;">[[File:ABGO TopSpeed.png|25px|link=]] 4 to 13<br />[[File:ABGO Acceleration.png|25px|link=]] 2 to 11<br />[[File:ABGO Handling.png|25px|link=]] 1 to 10<br />[[File:ABGO Strength.png|25px|link=]] 5 to 14</p> |
||
| + | |- |
||
| + | |[[File:KART32.png|center|120px]]<p style="text-align: center;">'''Beep Beep L6'''</p> |
||
| + | | |
||
| + | <p style="text-align: center;">[[File:Gem.png|25px|link=]] 1,500</p> |
||
| + | | |
||
| + | <p style="text-align: center;">321cc to 680cc</p> |
||
| + | | |
||
| + | <p style="text-align: center;">[[File:ABGO TopSpeed.png|25px|link=]] 6 to 15<br />[[File:ABGO Acceleration.png|25px|link=]] 4 to 13<br />[[File:ABGO Handling.png|25px|link=]] 2 to 11<br />[[File:ABGO Strength.png|25px|link=]] 3 to 12</p> |
||
| + | |- |
||
| + | |[[File:KART33.png|center|120px]]<p style="text-align: center;">'''Phoenix Star L6'''</p> |
||
| + | | |
||
| + | <p style="text-align: center;">[[File:Gem.png|25px|link=]] 1,500</p> |
||
| + | | |
||
| + | <p style="text-align: center;">331cc to 690cc</p> |
||
| + | | |
||
| + | <p style="text-align: center;">[[File:ABGO TopSpeed.png|25px|link=]] 7 to 16<br />[[File:ABGO Acceleration.png|25px|link=]] 5 to 14<br />[[File:ABGO Handling.png|25px|link=]] 3 to 12<br />[[File:ABGO Strength.png|25px|link=]] 4 to 13</p> |
||
|} |
|} |
||
| + | |-| |
||
| + | Angry Birds Go! v2.0= |
||
| + | {|class="wikitable" border=1 cellpadding=3 style=width:100%; border-collapse:collapse align=center |
||
| + | |- |
||
| + | !colspan=4 |[[File:ABGO_RockyRoadLogo.png|180px|link=Rocky Road]] |
||
| + | |- |
||
| + | !width=10% rowspan="1" |Kart |
||
| + | !width=10% colspan="1" |Unlocks at |
||
| + | !width=10% rowspan="1" |Cake Capacity |
||
| + | !width=25% rowspan="1" |Upgrade spots (stats) |
||
| + | |- |
||
| + | |[[File:KART29.png|center|120px]]<p style="text-align: center;">'''Cool Runner L1'''</p> |
||
| + | | |
||
| + | <p style="text-align: center;">Level 6-1</p> |
||
| + | | |
||
| + | <p style="text-align: center;">70 max</p> |
||
| + | | |
||
| + | <p style="text-align: left;"> |
||
| + | [[File:ABGO AccelerationV2.png|35px|Acceleration]] 3 (500, 560, 620) <br /> |
||
| + | [[File:ABGO HandlingV2.png|35px|Handling]] 3 <br/> |
||
| + | [[File:ABGO StrengthV2.png|35px|Strength]] 2 <br /> |
||
| + | [[File:ABGO TopSpeedV2.png|35px|Top speed]] 5 (??, 201, 202, 203, 204) <br/> |
||
| + | [[File:ABGO GripV2.png|35px|Grip]] 3 </p> |
||
| + | |- |
||
| − | ==Upgrade Prices== |
||
| − | King Pig's Karts |
||
| − | Top Speed:<span class="Apple-tab-span" style="white-space:pre"> </span>620-740-880-1020-1160-1320-1480-1640-1820 |
||
| + | |[[File:KART18.png|center|120px]]<p style="text-align: center;">'''Beach Buggy L2'''</p> |
||
| − | Acceleration:<span class="Apple-tab-span" style="white-space:pre"> </span>780-930-1100-1270-1450-1650-1840-2050-2270 |
||
| + | | |
||
| + | <p style="text-align: center;">TBD</p> |
||
| + | | |
||
| + | <p style="text-align: center;">100 max</p> |
||
| + | | |
||
| + | <p style="text-align: left;"> |
||
| + | [[File:ABGO AccelerationV2.png|35px|Acceleration]] 4 (??, ??, 860, 920) <br/> |
||
| + | [[File:ABGO HandlingV2.png|35px|Handling]] 2 (150, 151) <br/> |
||
| + | [[File:ABGO StrengthV2.png|35px|Strength]] 3 <br/> |
||
| + | [[File:ABGO TopSpeedV2.png|35px|Top speed]] 5 <br/> |
||
| + | [[File:ABGO GripV2.png|35px|Grip]] 2 (65, 70)</p> |
||
| + | |- |
||
| − | Handling:<span class="Apple-tab-span" style="white-space:pre"> </span>670-810-950-1100-1260-1420-1600-1780-1960 |
||
| − | Strength:<span class="Apple-tab-span" style="white-space:pre"> </span>520-620-730-850-970-1100-1230-1370-1510 |
||
| + | |[[File:KART23.png|center|120px]]<p style="text-align: center;">'''Capster L3'''</p> |
||
| + | | |
||
| + | <p style="text-align: center;">Player level 8</p> |
||
| + | | |
||
| + | <p style="text-align: center;">129 max</p> |
||
| + | | |
||
| + | <p style="text-align: left;"> |
||
| + | [[File:ABGO AccelerationV2.png|35px|Acceleration]] 3 (??, 800, 860) <br/> |
||
| + | [[File:ABGO HandlingV2.png|35px|Handling]] 3 (150 to 151) <br /> |
||
| + | [[File:ABGO StrengthV2.png|35px|Strength]] 2 <br/> |
||
| + | [[File:ABGO TopSpeedV2.png|35px|Top speed]] 5 (??, ??, ??, 217, 218) <br/> |
||
| + | [[File:ABGO GripV2.png|35px|Grip]] 3 </p> |
||
| + | |- |
||
| + | |[[File:KART23.png|center|120px]]<p style="text-align: center;">'''Capster L4'''</p> |
||
| + | | |
||
| + | <p style="text-align: center;">Capster L3 + 100 blueprints</p> |
||
| + | | |
||
| + | <p style="text-align: center;">129 to 140 max</p> |
||
| + | | |
||
| + | <p style="text-align: left;"> |
||
| + | [[File:ABGO AccelerationV2.png|35px|Acceleration]] <br/> |
||
| + | [[File:ABGO HandlingV2.png|35px|Handling]] <br /> |
||
| + | [[File:ABGO StrengthV2.png|35px|Strength]] <br/> |
||
| + | [[File:ABGO TopSpeedV2.png|35px|Top speed]] <br/> |
||
| + | [[File:ABGO GripV2.png|35px|Grip]] </p> |
||
| + | |- |
||
| − | The Blues' Karts |
||
| + | |- |
||
| − | Top Speed:<span class="Apple-tab-span" style="white-space:pre"> </span>650-780-910-1050-1200-1360-1520-1690-1860 |
||
| + | |[[File:KART31.png|center|120px]]<p style="text-align: center;">'''Big Burner L4'''</p> |
||
| + | | |
||
| + | <p style="text-align: center;">TBD</p> |
||
| + | | |
||
| + | <p style="text-align: center;">170 max</p> |
||
| + | | |
||
| + | <p style="text-align: left;"> |
||
| + | [[File:ABGO AccelerationV2.png|35px|Acceleration]] 3 (??, ??, 1040, 1100, 1160)<br/> |
||
| + | [[File:ABGO HandlingV2.png|35px|Handling]] 3 (??, 150, 151) <br/> |
||
| + | [[File:ABGO StrengthV2.png|35px|Strength]] 2 <br/> |
||
| + | [[File:ABGO TopSpeedV2.png|35px|Top speed]] 3 (222) <br/> |
||
| + | [[File:ABGO GripV2.png|35px|Grip]] 3 </p> |
||
| + | |- |
||
| − | Acceleration:<span class="Apple-tab-span" style="white-space:pre"> </span>820-970-1140-1310-1500-1690-1900-1900-2320 |
||
| + | |[[File:KART26.png|center|120px]]<p style="text-align: center;">'''Punch Box L4'''</p> |
||
| − | Handling:<span class="Apple-tab-span" style="white-space:pre"> </span>700-840-990-1140-1300-1470-1640-1820-2010 |
||
| + | | |
||
| + | <p style="text-align: center;">500 blueprints</p> |
||
| + | | |
||
| + | <p style="text-align: center;">176 to 210 max</p> |
||
| + | | |
||
| + | <p style="text-align: left;"> |
||
| + | [[File:ABGO AccelerationV2.png|35px|Acceleration]] <br/> |
||
| + | [[File:ABGO HandlingV2.png|35px|Handling]] <br/> |
||
| + | [[File:ABGO StrengthV2.png|35px|Strength]] <br/> |
||
| + | [[File:ABGO TopSpeedV2.png|35px|Top speed]] <br/> |
||
| + | [[File:ABGO GripV2.png|35px|Grip]] </p> |
||
| − | Strength:<span class="Apple-tab-span" style="white-space:pre"> </span>540-650-760-880-1000-1130-1260-1410-1550 |
||
| + | |- |
||
| + | |[[File:KART21.png|center|120px]]<p style="text-align: center;">'''Royal Snout L3'''</p> |
||
| + | | |
||
| + | <p style="text-align: center;">800 blueprints</p> |
||
| + | | |
||
| + | <p style="text-align: center;">208 to 250 max</p> |
||
| + | | |
||
| + | <p style="text-align: left;"> |
||
| + | [[File:ABGO AccelerationV2.png|35px|Acceleration]] <br/> |
||
| + | [[File:ABGO HandlingV2.png|35px|Handling]] <br/> |
||
| + | [[File:ABGO StrengthV2.png|35px|Strength]] <br/> |
||
| + | [[File:ABGO TopSpeedV2.png|35px|Top speed]] <br/> |
||
| + | [[File:ABGO GripV2.png|35px|Grip]] </p> |
||
| − | Terence's Karts (Unknown) |
||
| + | |- |
||
| − | ==Trivia== |
||
| + | |||
| − | *The Blues' and Terence's karts look like monster trucks more than karts and King Pig's karts look like buggies. |
||
| + | |[[File:KART33.png|center|120px]]<p style="text-align: center;">'''Phoenix Star L5'''</p> |
||
| − | *Some of King Pig's karts have the word "royal" in their names. |
||
| + | | |
||
| − | *King Pig's L6 kart, the Royal Rumbler, is more like an L4 kart because Royal Snout looks like an L6 kart because of it's golden colors and a red and gold chest behind. |
||
| + | <p style="text-align: center;">1000 blueprints</p> |
||
| + | | |
||
| + | <p style="text-align: center;">255 to 300 max</p> |
||
| + | | |
||
| + | <p style="text-align: left;"> |
||
| + | [[File:ABGO AccelerationV2.png|35px|Acceleration]] 6 (500, 560, 620, 680, 740, 800)<br/> |
||
| + | [[File:ABGO HandlingV2.png|35px|Handling]] 6 (150, 151) <br/> |
||
| + | [[File:ABGO StrengthV2.png|35px|Strength]] 7 (400, 410, <br/> |
||
| + | [[File:ABGO TopSpeedV2.png|35px|Top speed]] 8 (230, 231, 232, 233, 234, 235, )<br/> |
||
| + | [[File:ABGO GripV2.png|35px|Grip]] 7 (50, 55, 60, 65, 70, 75, 80)</p> |
||
| + | |||
| + | |||
| + | |- |
||
| + | |||
| + | <!-- |
||
| + | |[[File:KART34.png|center|120px]]<p style="text-align: center;">'''Lucky Goat 888 L6 ([[GO!_Karts#Special_Karts|*]])'''</p> |
||
| + | |[[File:KART85.png|center|120px]]<p style="text-align: center;">'''Monkey Kart L6 ([[GO!_Karts#Special_Karts|*]])'''</p> |
||
| + | |[[File:KART19.png|center|120px]]<p style="text-align: center;">'''Royal Blue L2'''</p> |
||
| + | |[[File:KART20.png|center|120px]]<p style="text-align: center;">'''Green Machine L3'''</p> |
||
| + | |[[File:KART23.png|center|120px]]<p style="text-align: center;">'''Capster L1'''</p> |
||
| + | |[[File:KART24.png|center|120px]]<p style="text-align: center;">'''Lucky Skater L2'''</p> |
||
| + | |[[File:KART25.png|center|120px]]<p style="text-align: center;">'''Home Runner L3'''</p> |
||
| + | |[[File:KART28.png|center|120px]]<p style="text-align: center;">'''Card-Board L1'''</p> |
||
| + | |[[File:KART30.png|center|120px]]<p style="text-align: center;">'''Picnic Packer L3'''</p> |
||
| + | |[[File:KART22.png|center|120px]]<p style="text-align: center;">'''Royal Rumbler L6'''</p> |
||
| + | |[[File:KART27.png|center|120px]]<p style="text-align: center;">'''Tri-Toaster L6'''</p> |
||
| + | |[[File:KART32.png|center|120px]]<p style="text-align: center;">'''Beep Beep L6'''</p> |
||
| + | ---> |
||
| + | |} |
||
| + | </tabber> |
||
== Gallery == |
== Gallery == |
||
| + | <gallery orientation="none" position="center" captionalign="center" hideaddbutton="true"> |
||
| + | Rockyroad3nr4wnt09u35.png|Rocky Road from episode selection<br/> (''Angry Birds Go!'' v1.0) |
||
| + | RockyRoadYearOfTheGoatUpdate.png|Rocky Road from episode selection<br/> (Chinese New Year Update; v1.6.3) |
||
| + | ABGO LoadingScreen4.png|Loading screen |
||
| + | abGOcutscene07.png|Rocky Road cutscene 1 |
||
| + | abGOcutscene08.png|Rocky Road cutscene 2 |
||
| + | abGOcutscene09.png|Rocky Road cutscene 3 |
||
| + | abGOcutscene10.png|Rocky Road cutscene 4 |
||
| + | abGOcutscene11.png|Rocky Road cutscene 5 |
||
| + | abGOcutscene12.png|Rocky Road cutscene 6 |
||
| + | </gallery> |
||
| + | |||
| + | ==Videos== |
||
<gallery> |
<gallery> |
||
| + | File:Angry Birds GO Android Walkthrough - Part 6 - Rocky Road- Track 1 |
||
| − | Rocky_Road_Cutscence_1.jpg|Rocky Road Cutscene 1 |
||
| + | Angry Birds GO Android Walkthrough - Part 7 - Rocky Road Track 2 |
||
| − | Rocky_Road_Cutscence_2.jpg|Rocky Road Cutscene 2 |
||
| + | Angry Birds GO Android Walkthrough - Part 8 - Rocky Road- Track 2 Champion Chase |
||
| − | Rocky_Road_Cutscence_3.jpg|Rocky Road Cutscene 3 |
||
| + | Angry Birds GO Android Walkthrough - Part 9 - Rocky Road- Track 3 |
||
| − | Rocky_Road_Cutscence_4.jpg|Rocky Road Cutscene 4 |
||
| + | Angry Birds GO Android Walkthrough - Part 10 - Rocky Road- Track 3 Champion Chase |
||
| − | Rocky_Road_Cutscence_5.jpg|Rocky Road Cutscene 5 |
||
| − | Rocky_Road_Cutscene_6.jpg|Rocky Road Cutscene 6 |
||
| − | k.png|king pig's beach buggy |
||
| − | royal blue dddd.png|king pig's royal blue |
||
| − | jh.png|king pig's green machine |
||
| − | RoyalSnout.png|King Pig's Royal Snout |
||
| − | RoyalRumbler.png|King Pig's Royal Rumbler |
||
| − | Capster.png|The Blues' Capster |
||
| − | skater lucki.png|The blues' lucky skater |
||
| − | Tri-Toaster.png|The Blues' Tri-Toaster |
||
| − | Card-Board.png|Terence's Card-Board |
||
| − | BeepBeep.png|Terence's Beep Beep |
||
| − | PhoenixStar.png|Hal's Phoenix Star |
||
</gallery> |
</gallery> |
||
| + | |||
| − | {{Episodes}} |
||
| + | ==Trivia== |
||
| − | [[Category:Episodes]] |
||
| + | *[[The Blues]]' and [[Terence]]'s karts look like monster trucks more than karts and [[King Pig]]'s karts look like buggies. |
||
| − | [[Category:Angry Birds Go!]] |
||
| + | *Some of King Pig's karts have the word "royal" in their names. |
||
| + | *King Pig's L6 kart, the Royal Rumbler, is more like an L4 kart because Royal Snout looks like an L6 kart because of its golden colors and a red and gold chest behind. |
||
| + | {{AngryBirdsGONav}} |
||
| + | [[Category:Angry Birds Go! Episodes]] |
||
| + | [[Category:Released Episodes of 2013]] |
||
Latest revision as of 23:52, 27 July 2023
Rocky Road is the second episode/circuit in Angry Birds Go! The track has bumpy and wavy roads, as well as large ramps made up of the roads.
In the Angry Birds Go! 2.0 update, a kart to Rocky Road (Cool Runner) is unlocked after beating event 4–1, making it the 4th track to unlock.
Tracks
- Mighty Mountain
- Hog Hideaway
- Oink Canyon
List of Rocky Road Karts

| |||
|---|---|---|---|
| Karts | Cost | Cake Capacity | Stats |
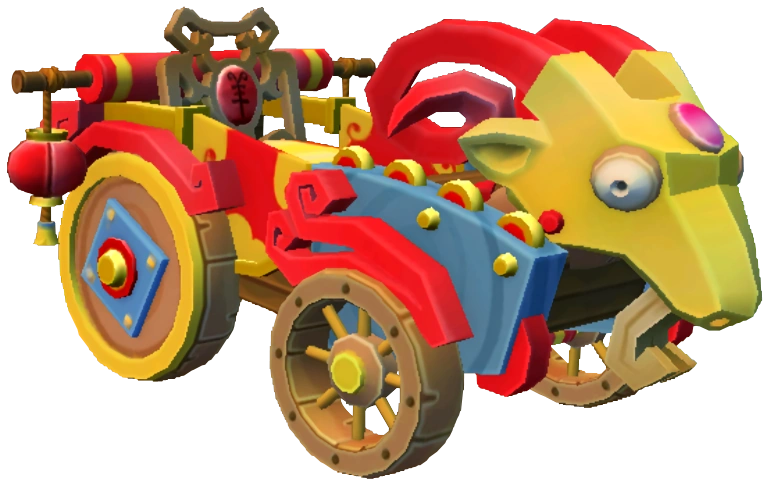 Lucky Goat 888 L6 (*) |
|
301cc to 660cc |
|
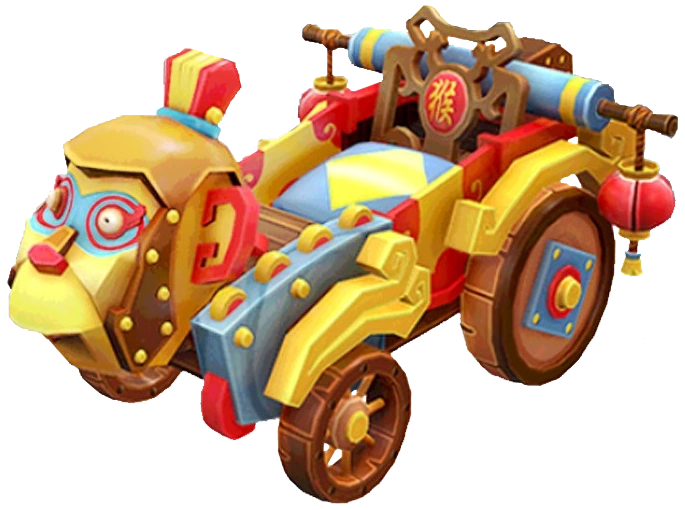 Monkey Kart L6 (*) |
Free (limited time; unlock after you get 88 seconds of airtime over every event) |
301cc to 660cc |
|
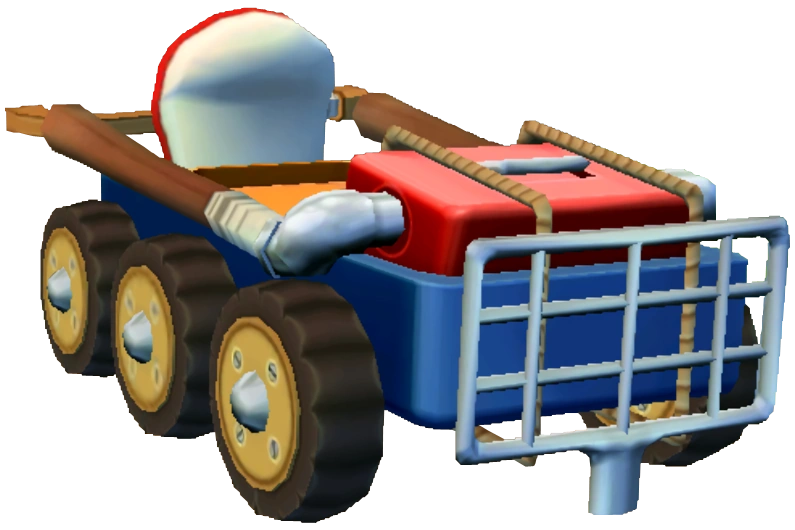
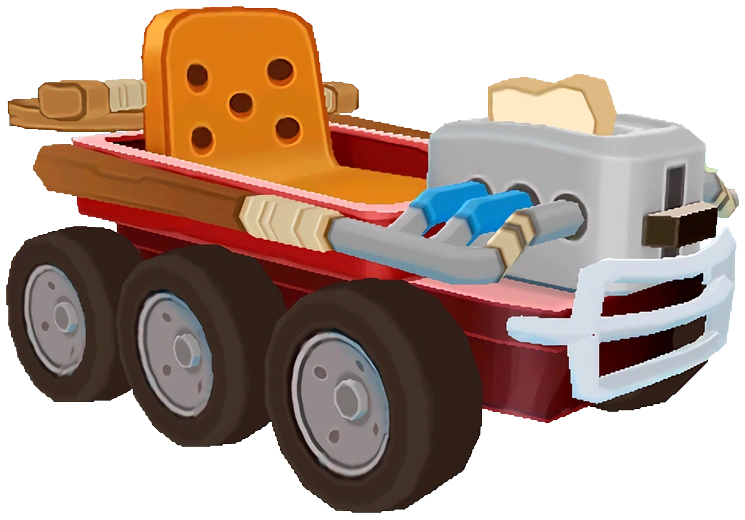
 Beach Buggy L1 |
|
271cc to 390cc |
|
 Royal Blue L2 |
N/A |
390cc to 510cc |
|
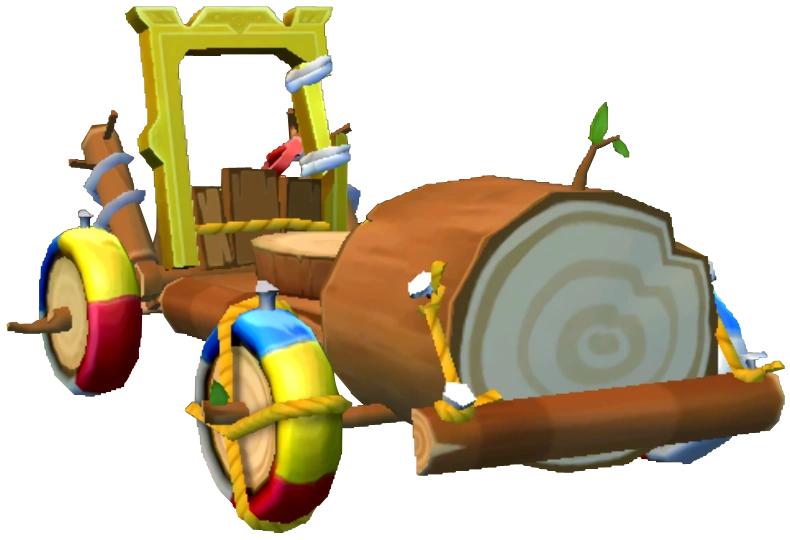
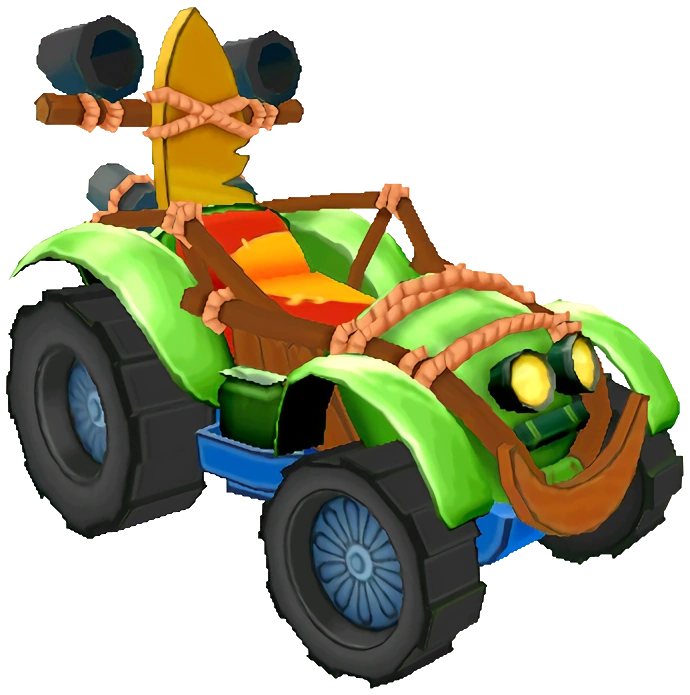
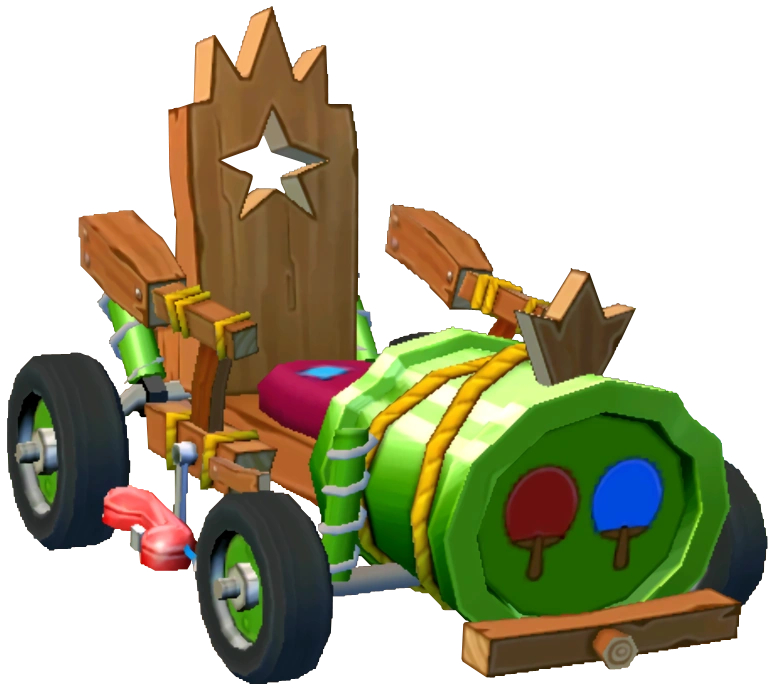 Green Machine L3 |
N/A |
510cc to 630cc |
|
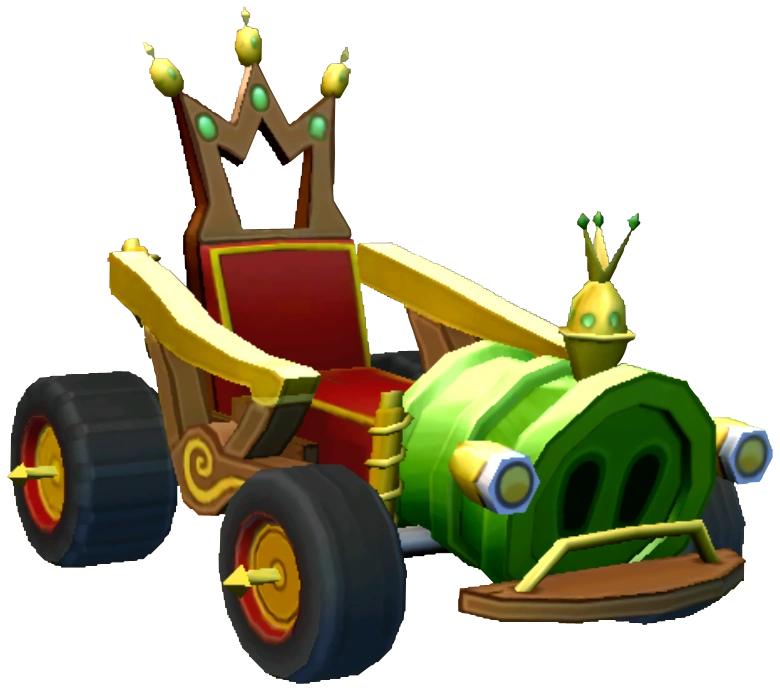
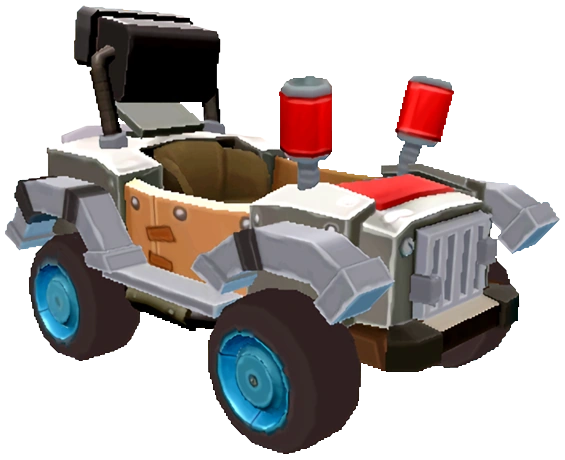
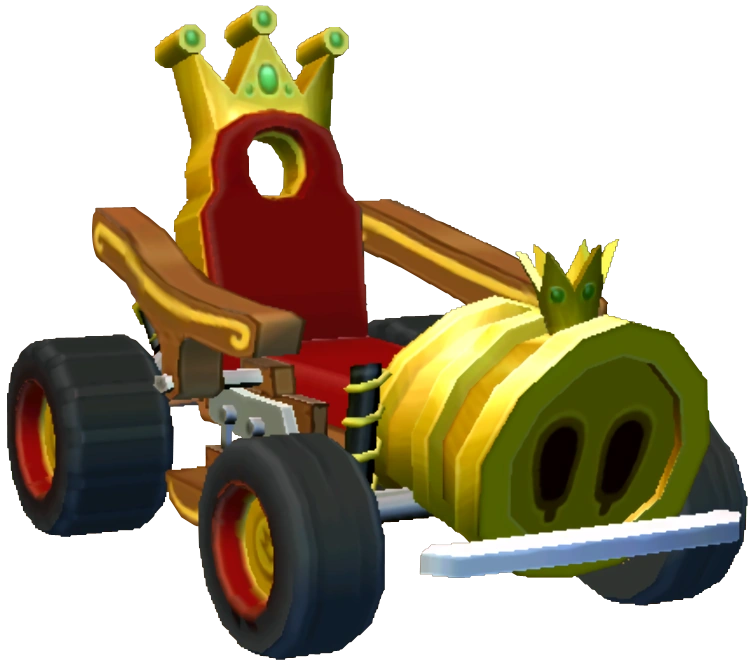 Royal Snout L4 |
N/A |
630cc |
|
 Capster L1 |
|
281cc to 400cc |
|
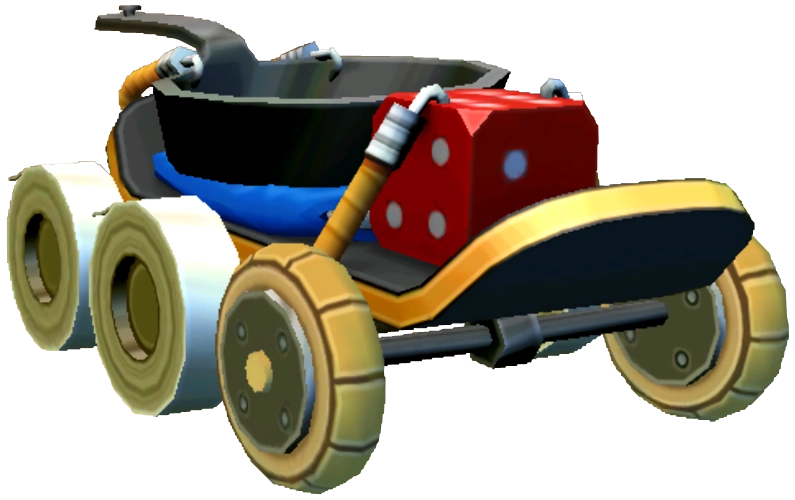 Lucky Skater L2 |
N/A |
401cc to 520cc |
|
 Home Runner L3 |
N/A |
520cc to 640cc |
|
 Punch Box L4 |
N/A |
640cc |
|
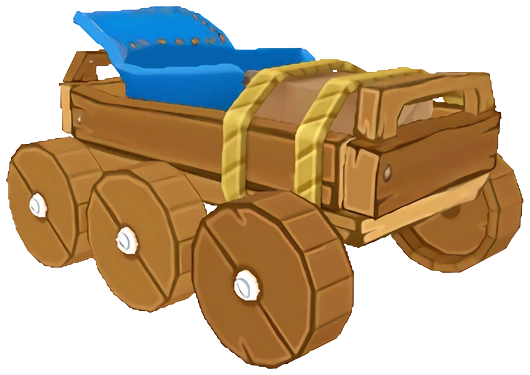
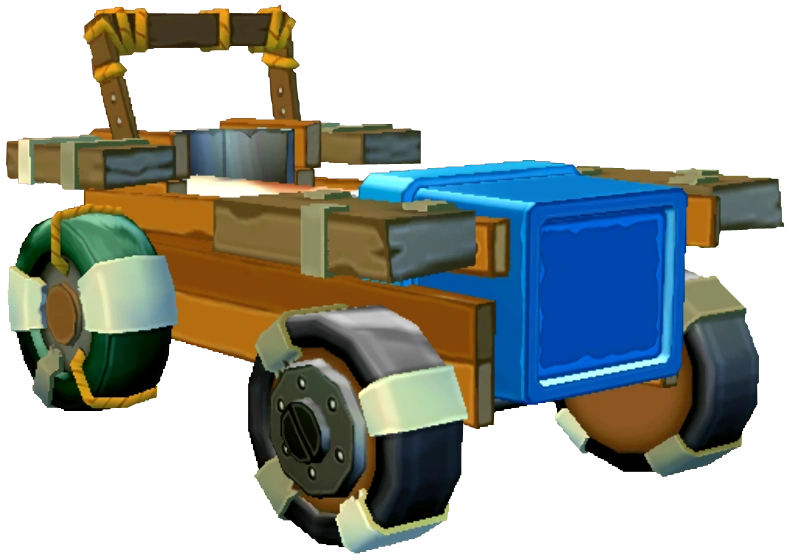
 Card-Board L1 |
|
291cc to 410cc |
|
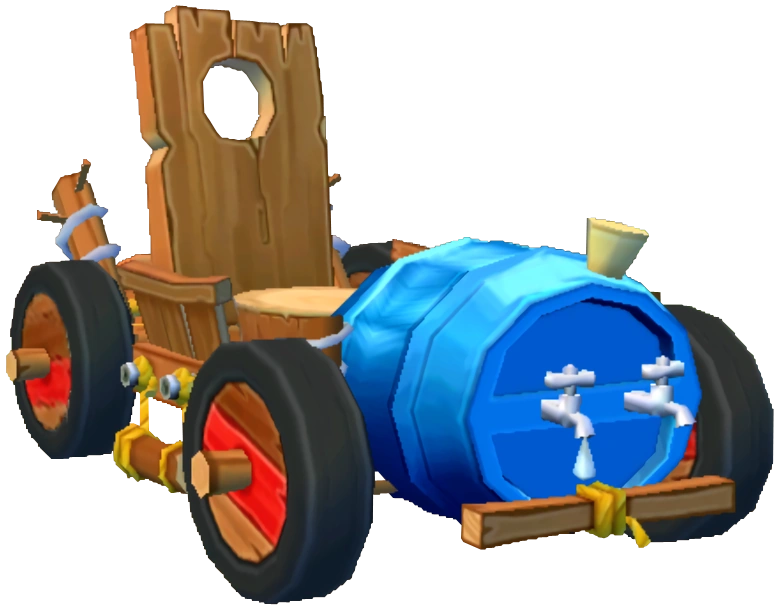
 Cool Runner L2 |
N/A |
410cc to 530cc |
|
 Picnic Packer L3 |
N/A |
530cc to 650cc |
|
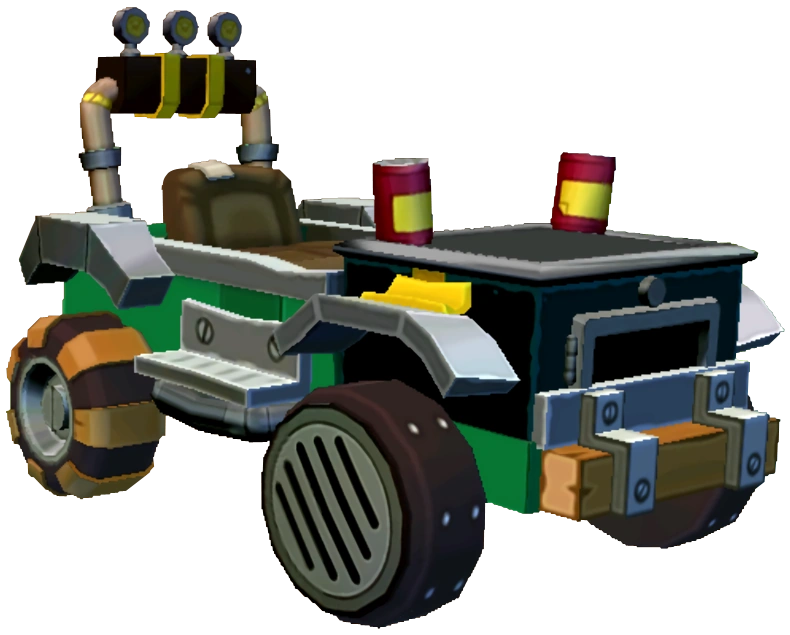 Big Burner L4 |
N/A |
650cc |
|
 Royal Rumbler L6 |
|
301cc to 660cc |
|
 Tri-Toaster L6 |
|
311cc to 670cc |
|
 Beep Beep L6 |
|
321cc to 680cc |
|
 Phoenix Star L6 |
|
331cc to 690cc |
|

| |||
|---|---|---|---|
| Kart | Unlocks at | Cake Capacity | Upgrade spots (stats) |
Cool Runner L1 |
Level 6-1 |
70 max |
|
Beach Buggy L2 |
TBD |
100 max |
|
Capster L3 |
Player level 8 |
129 max |
|
Capster L4 |
Capster L3 + 100 blueprints |
129 to 140 max |
|
Big Burner L4 |
TBD |
170 max |
|
Punch Box L4 |
500 blueprints |
176 to 210 max |
|
Royal Snout L3 |
800 blueprints |
208 to 250 max |
|
Phoenix Star L5 |
1000 blueprints |
255 to 300 max |
|
Gallery
")
(Angry Birds Go! v1.0)
")
(Chinese New Year Update; v1.6.3)
")
")
")
")
")
")
")
Videos
")
")
")
")
")
Trivia
- The Blues' and Terence's karts look like monster trucks more than karts and King Pig's karts look like buggies.
- Some of King Pig's karts have the word "royal" in their names.
- King Pig's L6 kart, the Royal Rumbler, is more like an L4 kart because Royal Snout looks like an L6 kart because of its golden colors and a red and gold chest behind.
| Main article | Gallery | Beta elements | Version history | Achievements | Credits | Glitches | Pre-releases (Countdown) | Re-releases (Create, Turbo Edition) | |||
| Playable characters | Red | Bomb | Stella | Bubbles | Matilda | Foreman Pig | King Pig | The Blues | Terence | Hal | Corporal Pig | Chuck | Ayrton Senna* | Chronicler Pig*** | Ice Bird*** | ||
| Non-playable characters | Chronicler Pig* | Mechanic Pig* | Minion Pigs | ||
| Tracks | Seedway | Sub Zero | Air | Rocky Road | Stunt | Weekly Tournament | Jenga | ||
| Vehicles | Air Guita | Arctic Roller | Barbequick | Barrel Roller | Beach Buggy | Big Boomer | Big Burner | Blue Cornet | Capster | Cool Runner | Cork Wagon | Drum Roller | Ham Glider | Hog Rod | Iron Belt | Matchstick Mobile | Music Maker | Phoenix Star | Pinky Tonk | Point Breaker | Punch Box | Rocket Racer | Royal Snout | Semi-Skinner | Shred Sled | Snow Scoop | Sponge Cruiser | Strike Out | Sty GT | Tar Barreller | Tracked Trekker | Trash Thrasher | Tub Thumper | Woodwind | ||
| Items | Bird Coins | Blueprint** | Booster (Boost*, Kart Repair*, King Sling, Target Kart*) | Gems | Ticket** | Toolbox** | ||
| Gimmicks and obstacles | Glass | Stone | TNT | Wood | ||
| Music | Albums | Angry Birds Go (Original Game Soundtrack) | |
| Songs | "Songbird" | ||
| Other | Earth (Piggy Island) | Level Failed | Star | Telepods | Rovio Account | Cancelled sequel | ||
| *Appears in the 1.0.0 version only **Appears in the 2.0.0 version only ***Unused | |||